Apple, Rosemary and Lemon Jelly
- Jams, Jellies & Marmalades
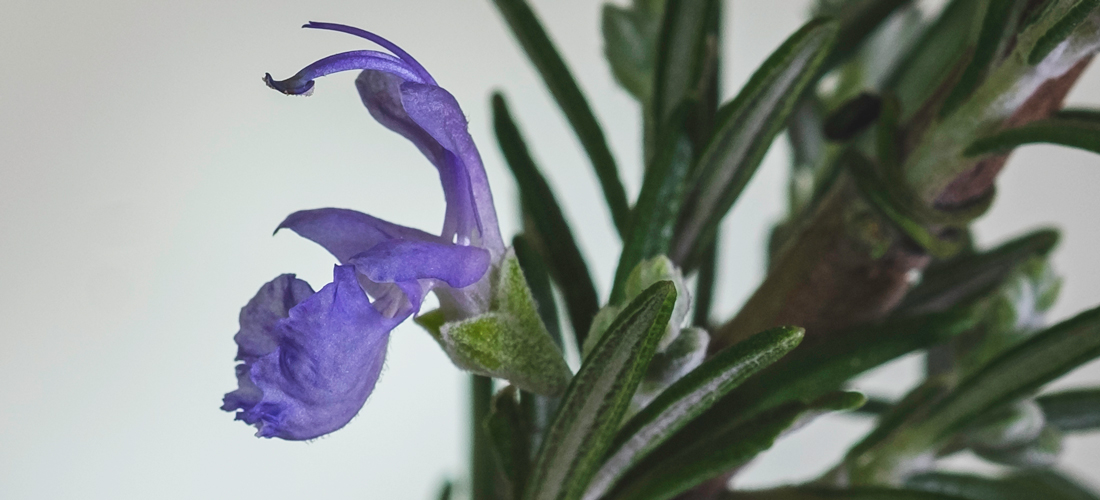
Apple, with its high pectin content is the carriage for many fruit and herb jellies. Providing a crisp green floral fruit base, it provides the perfect foil for rosemary. Infused during the cooking process, rosemary adds a fragrant warming pine-like, herby flavour and marries perfectly with the refreshing hints of lemon. These flavours are classic partners for lamb, goat’s cheese and offer unique matches with chocolate, orange, and lemon sweet dishes. Try paring it with your dessert as an accompaniment. The perfect jelly should quiver with the excitement of tantalising your taste buds. The secret to a perfectly clear jelly is the straining process.
- Preparation Time:
- 30 minutes plus straining juice overnight
- Cooking Time:
- 1 hour
- Quantity:
- 3-4 x 300 ml jars
INGREDIENTS
- 600g
- Granny Smith apples, or similar cooking variety
- 4
- Rosemary fresh, 10cm stalks
- 1
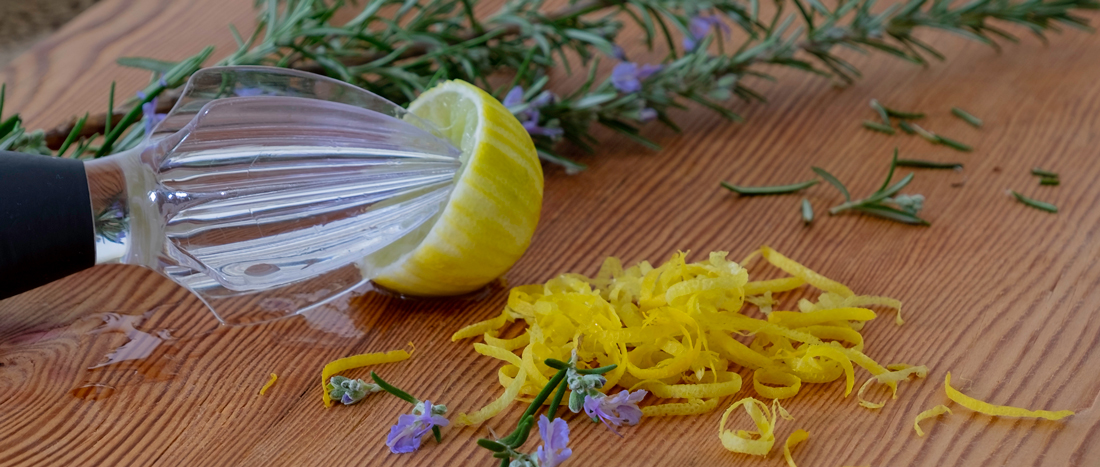
- Lemon, fresh
- 1 litre
- Water
- 500g
- Sugar, white, per 500 ml apple juice
- 3
- Rosemary, additional, 10 cm stalks
METHOD
The principles of jelly making are the same as jam. Both are dependent upon extracting good fruit flavour and getting the right balance between the pectin, sugar, and acid. Jellies are made with juice strained from simmered fruit and then cooked with sugar to the setting point. A perfectly set jelly should be crystal clear, sparkle with clarity and quiver when spooned out of the jar.
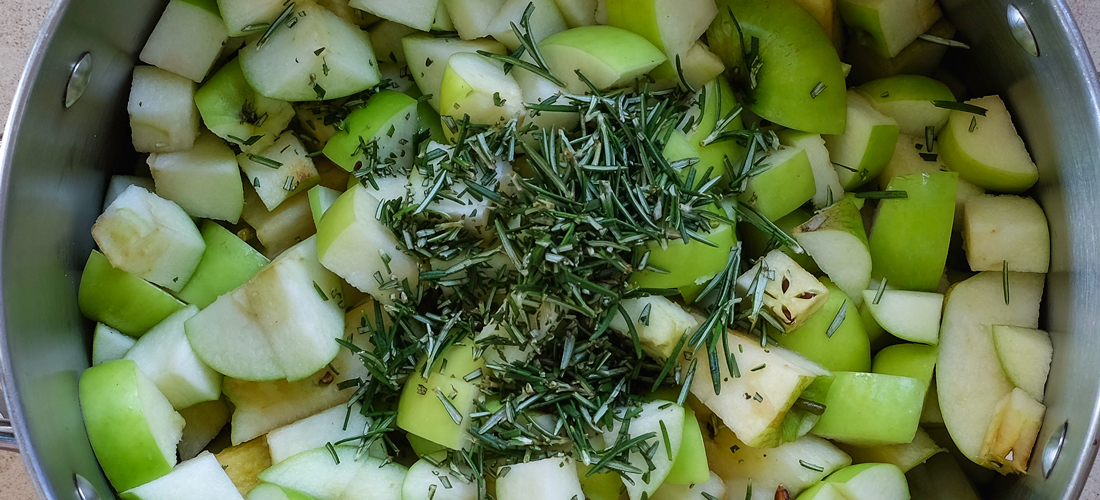
Wash the apples to remove any garden or shop debris. If using windfall apples remove any bruised or damaged areas. Leaving the skin on, and without removing the core or pips, cut the apples into large pieces approximately 4 to 5 cm.
Place the apples including the core and seeds into a preserving or heavy-based pan. Using a vegetable peeler, remove the peel from the lemon, then juice and reserve the juice until later.
Wash the rosemary and remove from the stalk and finely chop. Add the rosemary and lemon peel to the pan to flavour the base juice
Add the water, it should just cover the apples. Place on heat and bring to the boil. Reduce the heat, stirring occasionally, simmer approximately 45 minutes or until the apples are very soft and become pulpy.
To scald the jelly bag, place in a heat resistant bowl and pour boiling water over it. Allow to cool until it is cool enough to handle. Squeeze out the excess water. I use clean kitchen rubber gloves for this step. Set-up the jelly bag in its cradle. Ladle the apple pulp and juice in and strain overnight. While the juice is straining, do not force the liquid from the apple pulp. The Notes section below includes a couple of options on how to construct a jelly bag using general household equipment and readily available material.
The next day, measure the juice, pour into the preserving pan, and reheat.
Add 500g of warmed sugar to each 500ml of strained apple juice. Stir until the sugar crystals have dissolved and add the lemon juice - approximately 2 tablespoons .
Return to the boil, then boil rapidly, occasionally removing any fruit scum that rises to the surface, until setting point is reached. Approximately 5 minutes prior to the setting point add the additional whole rosemary leave so that its colour is retained and has an attractive presentation when set in the jar.
Leave to cool for 5-10 minutes, to ensure the rosemary is evenly distributed. If the jelly starts to set, ladle into the jars immediately. If required, return to the heat and warm briefly on a low heat until it is liquid again.
Use a funnel to pour into dry sterilised jars and fill to approximately 2.5cm (1 inch) from the top. Seal jars while the jelly is hot. Alternatively, If using paraffin wax to seal the jar, pour the melted wax over the preserve while it is hot and cover with cellophane and secure with rubber band or seal with jar lids.
-
Label, and store in a cool dark place in the kitchen or pantry.
Refrigerate after opening.
NOTES
- Choose clean ripe fruit. Never use mouldy fruit as this will produce a poor-quality jelly. Windfall apples can be used to make apple-based jelly. Ensure all damaged or bruised areas are removed as this can taint the flavour.
- For a strong jelly set use fruit that is just ripe, as it has a higher pectin content than over-ripe fruit.
- Gently simmer the fruit to extract the maximum amount of pectin and to reduce excess evaporation. Boiling at this point can result in a cloudy jelly.
- The Jelly Bag
- A jelly bag is essential to making jelly. It's easily made using heavy-duty calico, cotton flannel or close-weave nylon, multiple layers of muslin (cheesecloth) or any other material that will only allow the fruit juice to flow through. The skin, seeds and pulp must remain inside the bag.
- Before use, sterilise the bag by scalding it with boiling water. This will also help the juices to flow through the bag, rather than being absorbed into it.
- Secure the jelly bag tightly, using loops or very strong tape, on a stand, upturned stool, or chair, in a jelly bag holder or over a stainless-steel sieve. Place a bowl underneath to catch the juice as it strains.
- To clean the jelly bag, remove pulp and seeds and rinse under cold water to remove excess fruit mass. Thoroughly wash the bag, rinsing well to remove all traces of detergent. Dry completely before storing. The bag can be reused multiple times, however, scald it before every use.
- Fill the jelly bag progressively with fruit and cooked juice and leave the fruit to drain for minimum 4 hours, preferably overnight.
- Do not squeeze the bag to extract as juice as this will create a cloudy jelly.
- To warm the sugar, put the recipe quantity in an oven proof container and place in a preheated oven to 150 degrees C for approximately 10 minutes. The sugar should be warm throughout the bowl. Warmed sugar, dissolves quickly and a rapid boil until the setting point is reached helps to preserve the fresh fruit flavour
- Adding cold sugar will reduce the initial heat of the jelly juice, causing it to take additional time to come back to the boil. The time will depend on the type, size, and depth of the container.
- Once the sugar has dissolved in the juice, boil rapidly until the jelly reaches its setting point. Rapid boiling helps to preserve the fresh fruit flavour.
- Jellies set very quickly once they reach their setting point. Fill the jars immediately the setting point has been reached using a warm, dry stainless steel or plastic funnel. If the jelly starts to set in the pan, return to stove and warm it briefly on a low heat until it is liquid again.
- To remove any air bubbles, gently tap the jars once they have been filled.
- Often a small knob of butter is added to marmalade or jam to disperse the scum. Do not use this technique with a jelly as it will make it cloudy.
- Jelly yield is lower than jam as the pulp is discarded. The final yield will depend upon the juice content of the fruit, and this is influenced by the fruit’s ripeness, growing conditions and time of year.
- They can be stored for up to 2 years. However, it is recommended to eat up preserves before the new season.
- Removing the scum
- Jams, jellies, and marmalades can produce a scum while they are boiling. Impurities from the fruit and sugar will rise to the surface and a fine frothy foam will move towards the edge of the preserving pan. Some fruits will produce more scum than others.
- This is a natural self-clarification process and makes the task of making a high-quality preserve easier. Removing the scum increases the preserve’s clarity. This is very important if it is being submitted for competition. Remove the scum before bottling. Using a stainless-steel spoon, skim the scum from around the edge of the preserving pan. Be careful to remove just the scum and not the jam. This can be done while the preserve is boiling and/or once it has been taken off the heat. Do not attempt to remove the scum from the centre of a boiling pan, as there is a high risk it will splutter and hot preserve burns.
- Using paraffin Wax
- Paraffin wax is available in specialty preserving stores and some rural hardware stores.
- The melted wax must be poured over the preserve while it is hot.
- Break the wax into small pieces and heat in a bowl set over a pan of hot water. Bring to the boil, reduce the heat to maintain a gentle simmer until the wax is just melted
- Do not overheat. If it gets too hot it will shrink away from the sides of the preserving jar as it cools. This will break the seal and allow impurities to access the contents, encouraging mould growth.
- Working quickly pour a thin layer over the hot preserve. Using a small wooden cocktail stick, toothpick, or cake skewer, prick any air bubbles.
- Allow the wax to set. Then pour a second thin layer to make a seal approximately 3mm thick.
- When the wax has set it will become opaque and dip slightly in the middle.
- To use the preserve, break the wax seal and remove.
- Cover the jar with clear film and store in the fridge.
- Sealing with wax is not a long-term solution. Use within a couple of months.